

Cheers to the New Year! Despite the absolute mess that 2020 was and the rocky start to 2021 that we’ve had, I’ve been trying my best remain hopeful that better days are ahead. So rather than dwell, I say let’s make the most of it and toast to a brighter future over a beautiful new bar!
My fiancé and I recently moved into a larger apartment (finally!) but a tradeoff was that our balcony downsized. Honestly, I didn’t even consider that it was possible to have a smaller balcony because our prior one was so outrageously skinny. Our new balcony however is just as skinny but also shorter, ha! Oh well, what can you do? Just make the best of it like we had to do in 2020! I absolutely love living in Los Angeles for a variety of reasons, but it definitely is not cheap to live here. Since I’m not rich or famous…yet 😉 , we live in a pretty regular old two bedroom apartment (a serious upgrade from our previous studio). Thus, I’ve really learned to make the most of my small space.
Now here we are with a wonderfully bigger space, but a tinnier balcony. We specifically wanted a balcony so our dog, Shasta, could hangout outside and watch cars and people go past, a favorite past time of hers. We also really aren’t homebodies and enjoy being outside as much as possible so having a place to eat, drink, and relax outside was important to us. Once we moved in to our new place we realized our little patio set was taking up the entire balcony. There wasn’t any room for Shasta to lay and it was a such hassle squeezing into the chairs that we stopped using them entirely. It didn’t take long before we all missed having an outdoor space, so I clearly I had to find a solution.
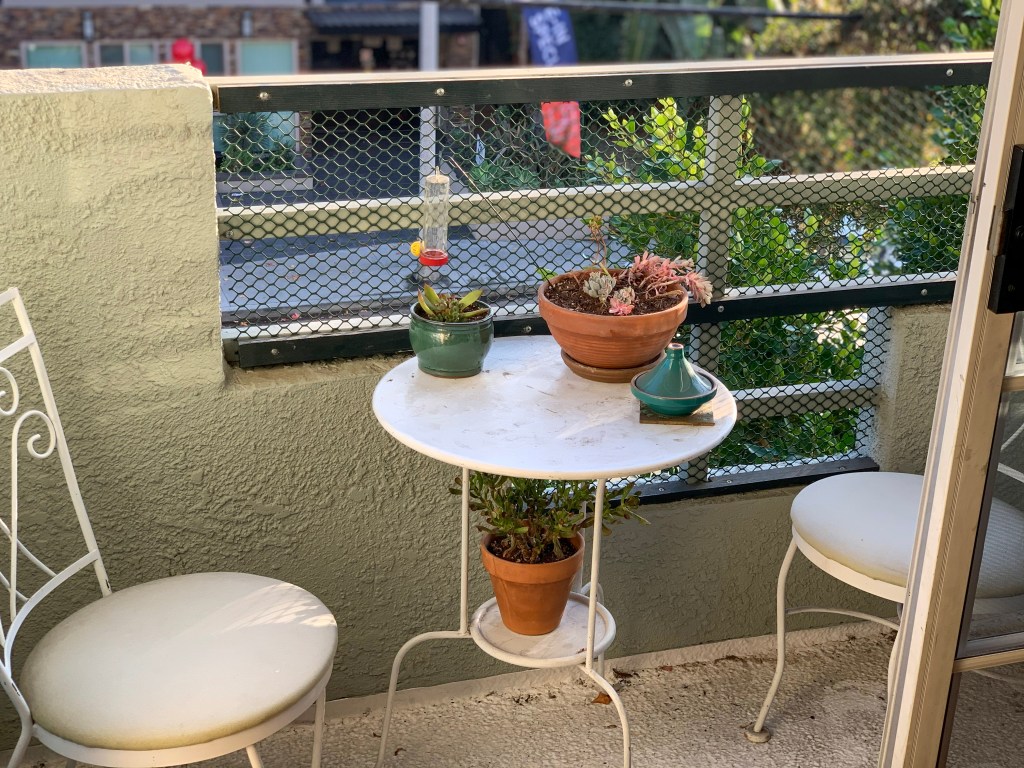
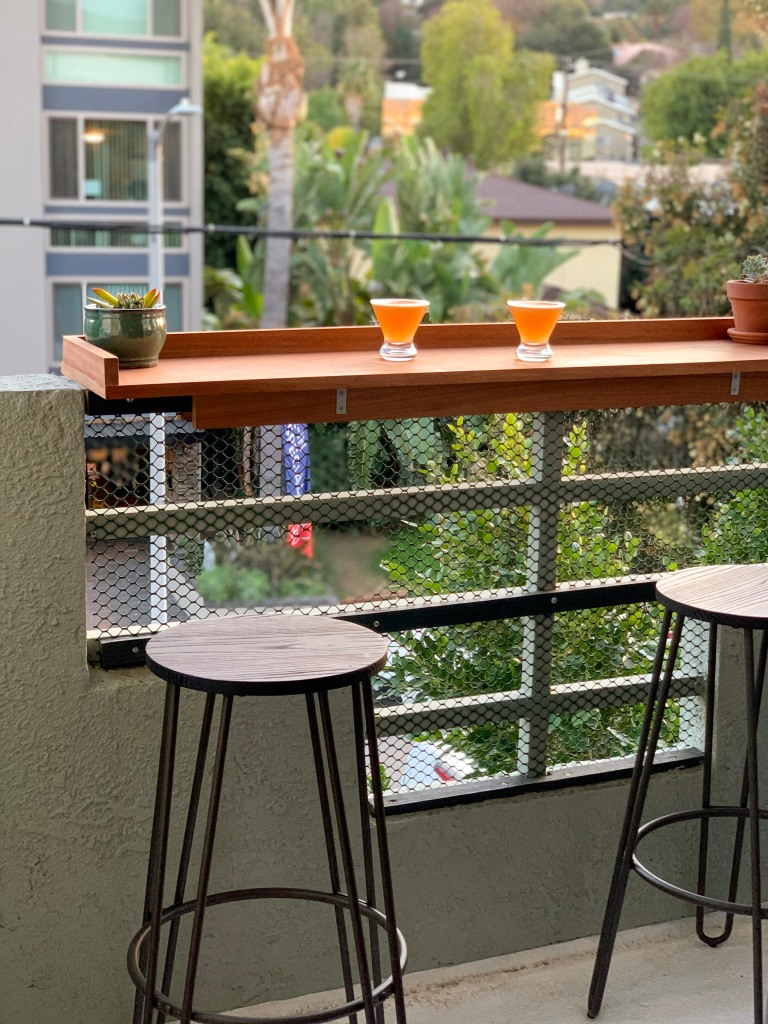
While sitting on the couch staring into the abyss of our sad little balcony it finally hit me, I thought to myself, “DUH! Why did I not think of this before? Just build a bar ON the balcony!” I’m sure you’ve seen or even sat at a skinny table jutting out from a wall with stools scattered underneath at a restaurant or bar? And I’m sure you’ve also seen those planters that just slip right over the top of the balcony ledge? Well I figured, just combine both concepts and make a bar table that slips onto our balcony wall and hangs over the opposite side to free up all the space. “Genius!”, I thought…I now realize I’m not actually that innovative and this definitely already exists haha. But! they only really seem to be on Esty and can be pricey. To be honest I didn’t even bother looking up buying one beforehand because I knew we could easily make this.
As always, I implore everyone to take a stab at DIY projects because they’re often not always as hard as one may think. I truly believe the main skill you need to successfully complete a DIY project is patience. Patience to read all the instructions, patience for how long it may take, patience to start over if you mess up. If you remain patient throughout the process you’re likely going to figure it out and end up with an awesome outcome that you can say YOU made. Being able to take ownership in hand-making something is a wildly satisfying feeling and I highly recommend it. Just remember, patience. And also, I’m just a regular twenty something girl with absolutely no education or advanced skills in building or woodworking so if I can do it, so can you. So let’s get to it.
Determine your measurements
Step one is measuring the space you’re working with. You will first need to measure the length and width of the bar you want. For example we decided to make our bar 5 feet x 1 foot based upon the length and width of our balcony. Be sure to take into consideration how much of the bar you’ll want hanging over where you will sit, as well as over the opposite side of the ledge. Additionally, be aware that about an inch will be taken off each side of the length and one inch off the side of the width to account for the edges that will be attached to the top of your bar. Second you will need to measure the width of the ledge your bar will be sitting on top of. This measurement needs to be exact so you can build the bar to fit snugly over the ledge and hold in place. Ours was 2 and 1/4 an inch. Third, determine the length of the brace boards that attach to the bottom of the bar. These should be one foot less than the length of your bar. Ours were 4 feet. Lastly, you will need to determine the length of the edges, one will be the length of your bar, the other two will be the width, minus 1 inch to account for the back edge. Ours were one 5 foot edge and two 11 inch edges.
Gather your materials
As mentioned we live in an apartment so we don’t have access to a lot of tools. If you do, awesome! This will be even easier for you. If not, you can do as I did, the only tool you will need is a drill. The Home Depot near us had all of the wood we needed and they will make cuts over 12 inches for you. I believe it was the first 4 cuts free and 50 cents thereafter (they kindly did all of ours for free anyway). They also have a station in the base board section where you can make your own cuts with a hand saw so you can use that to trim down your edges if needed.

Here’s what wood we needed based on the size of our bar:
- Bar top – One board 1in (H) x 12in (W ) x 5 ft (L)
- Edge boards – One board 1in (H) x 2in (W ) x 5ft (L),
Two boards 1in (H) x 2in (W ) x 11in (L) - Brace boards – Two boards 1in (H) x 3in (W ) x 4ft (L)
Here’s what else we needed:
- Eight 1-1/2in Corner Braces (2 Packs of 4 with Screws)
- Eight 1-1/2in screws
- Wood Glue
- Sandpaper
- Wax or Stain
Assemble
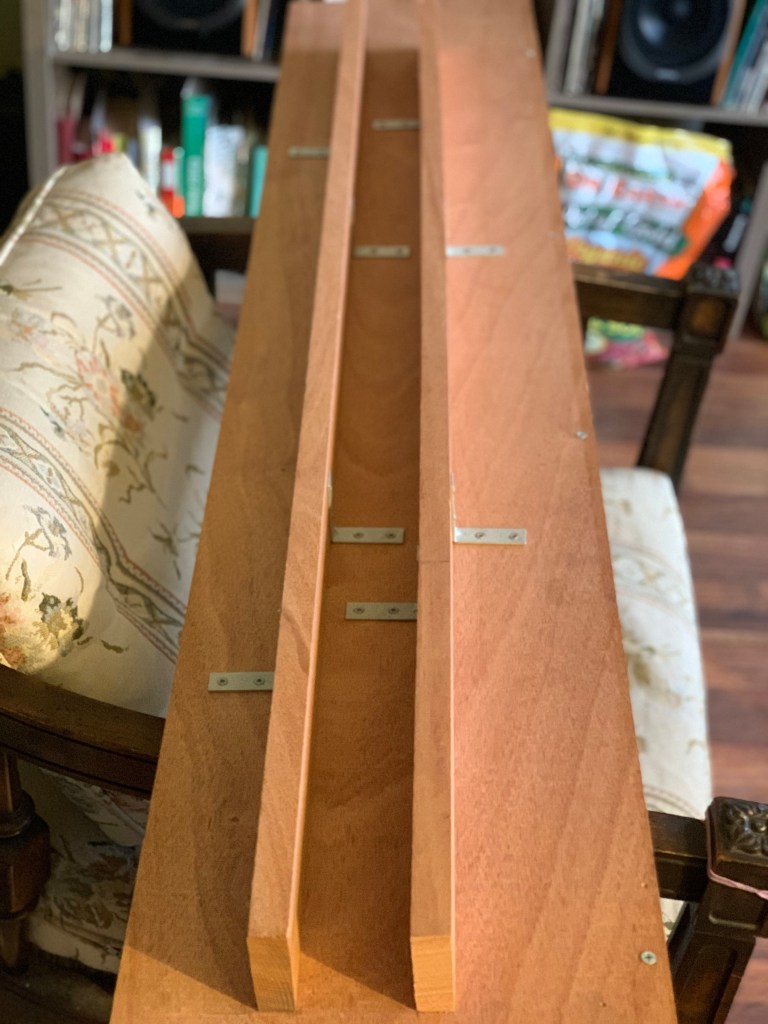
Once your boards are all cut to the proper lengths it’s time to assemble. First step is to attach the brace boards to the bottom of the bar. It is partially up you to decide where to place the brace boards as this will effect how much of the bar will hang over where you sit versus over the opposite side of your ledge. The safest and most sturdy method is to position them equidistant from the center of the bar with equal parts of the bar hanging off both sides. We chose to put ours slightly closer the back side to have a little more overhang over the ledge and save more space on our balcony. BUT BE CAREFUL, if you do this you can’t go too far out our your bar will not be sturdy enough to stay in place. I would suggest not moving the brace boards more than 2 inches away from the center in order to maintain stability.
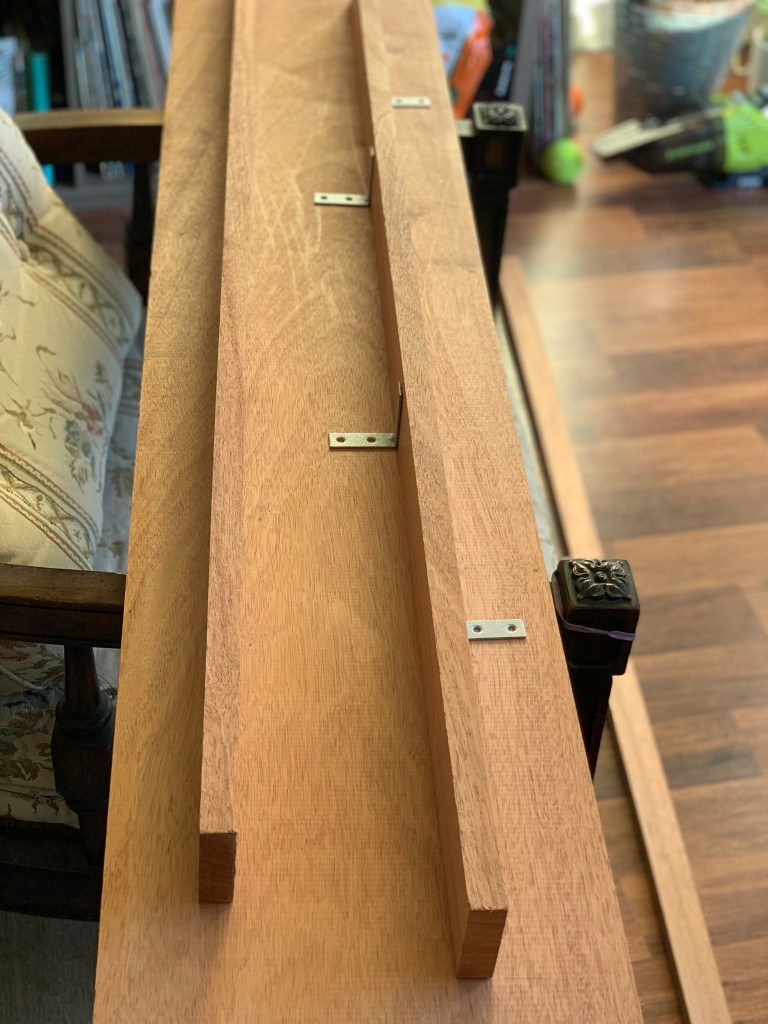
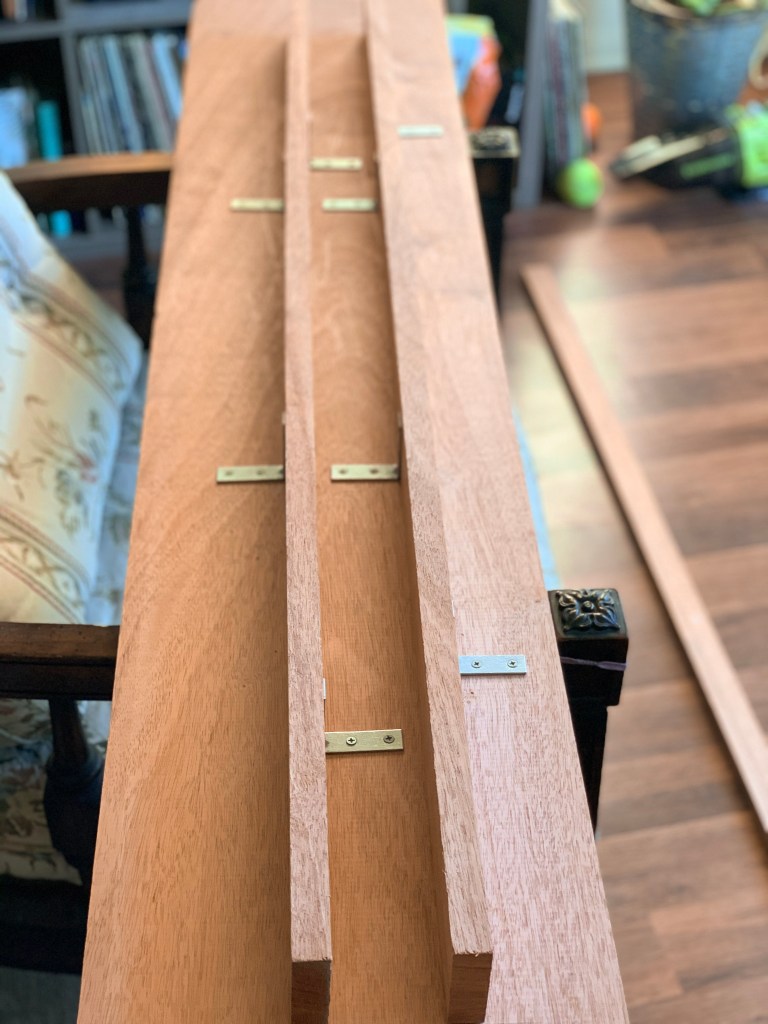
Now, remember the ledge width measurement you took? This will be the distance between the two brace boards plus the (very tiny) height of the corner braces that will go on the inside of both brace boards. Specifically, ledge width + (corner brace height x 2). For example, the width of our balcony ledge was 2 and 1/4 an inch and the width of a corner brace was 1/16 an inch, with two on each side of each brace, so they will take up 1/8 an inch between each board. Thus our brace boards then needed to be 2 and 3/8 an inch apart. Once your brace boards are properly positioned, glue them into place with wood glue. Once the glue dries, attach two corner braces to each side of each brace board by driving in the screws with a drill. Again, where to place your corner braces depends on the side of your bar. Roughly you will want the outer braces to be 3/4 of the length away from the center of the board and the inner braces to be a few inches closer than that to the center. Our outer braces were placed about 6 inches from each end of the board and the inner braces we placed about 3 inches from the inside of where the outer braces were placed.
Next attach the 1 inch side of the back edge board to the top of the bar with wood glue. Once the glue dries, drive screws through the bottom of the bar up through the edge to secure it to the bar top. The amount of screws you use will depend on the length of your bar. We used 4 screws equidistant apart. Follow the same process for the side edges.
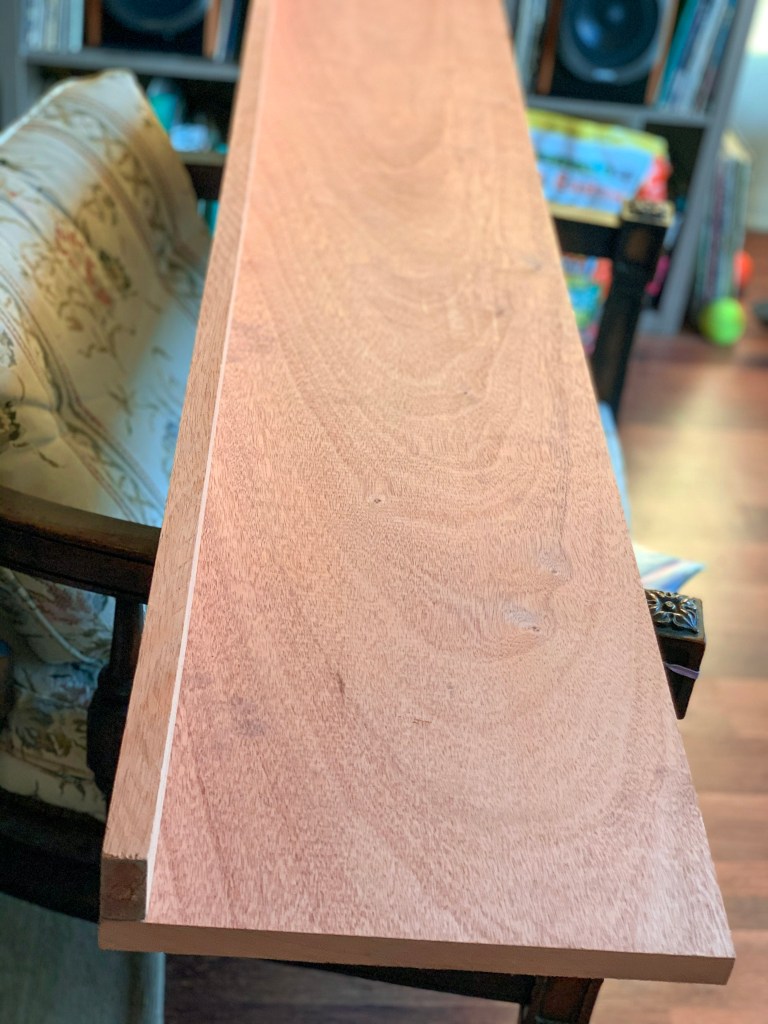
Finishing touches
To make your bar beautiful and enjoyable to use, sand down any rough sides and apply a coat of wax or stain. Lastly, apply a waterproofing sealant to protect it from the outdoor weather.
Now, sip a craft cocktail over your beautiful new handmade bar and cheers making the most of the year ahead!
Instructions
Supplies needed:
- A drill
- Measuring tape
- Wood (below are our measurements, you may need to alter the length/width of the boards for your space)
- Bar top – One board 1in (H) x 12in (W ) x 5 ft (L)
- Edge boards – One board 1in (H) x 2in (W ) x 5ft (L),
Two boards 1in (H) x 2in (W ) x 11in (L)
- Brace boards – Two boards 1in (H) x 3in (W ) x 4ft (L)
- Eight 1in x 1/2in corner braces (2 packs of 4 with screws)
- Eight 1-1/2in screws
- Wood glue
- Sandpaper
- Wax or stain
Steps:
- Measure the length and width you want for your bar. Measure the width of the ledge your bar will sit on. Measure the length needed for the brace boards, they should be one foot less than the length of your bar. Measure length of edge boards. The back edge board should be the length of your bar and the sides should be the width of your bar minus one inch.
- Cut boards to desired lengths. If you have the proper tools you may do this yourself, otherwise you can have this done at your local Home Depot as described above.
- Mark on the bottom of the bar top where to attach the brace boards. The width of your balcony ledge + 1/8 inch (height of the corner braces) will determine how far apart to place the brace boards from each other. Once you know how far apart they need to be, place the boards equidistant from the center of the bottom of the bar top and glue the brace boards in place with the wood glue. Let dry.
- To secure the brace boards, place two corner braces on the outer sides of each brace boards about 3/4 of the length away from the center of the board and drill them into the brace boards and bottom of the bar. Follow the same steps for the inner sides of the brace boards but stagger the inner corner braces a few inches closer to the center than the outer braces.
- Flip the bar over and glue the back edge board to the back end of the top of the bar. Then glue the side edge boards to the side ends of the top of the bar. Let dry then flip the bar back over and drill 4 screws equidistant through the bottom of the bar up into the back edge boards to secure it. Do the same with two screw into the bottom of the side edge boards.
- Sand the entire bar.
- Apply stain or wax to entire bar and let dry.
- Apply waterproofing sealant.


What kind of wood did you use?
LikeLike